Imagine a severe storm knocking out power in your neighborhood. Your fridge stops cooling, your heating system shuts down, and your security system goes offline. Without a backup power source, you’re left in the dark—literally.
A standby generator eliminates this risk, keeping your home powered automatically during an outage. But installing one isn’t as simple as plugging it in; it requires careful planning, professional expertise, and adherence to safety codes.
This guide from KSB Electric walks you through everything homeowners need to know about standby generator installation—from selecting the right unit to ensuring a safe, compliant setup.
Key Takeaways
✔ Assess power needs before choosing a generator.
✔ Select the right size and fuel type for efficiency and reliability.
✔ Follow local codes and permit regulations for compliance.
✔ Hire a licensed electrician to ensure safety and proper installation.
✔ Schedule regular maintenance to maximize lifespan and performance.
What Is a Standby Generator & How Does It Work?
Power outages can disrupt your entire household, leaving you without heating, cooling, refrigeration, or security systems.
According to the U.S. Energy Information Administration, the average U.S. home experiences 1.3 power outages per year, some lasting hours or even days.
A standby generator ensures you’re never left in the dark by automatically restoring power the moment an outage occurs. Unlike portable generators, standby units are permanently installed and connected to your home’s electrical system.
Types of Standby Generators
🔹 Natural Gas Generators: no refueling required, but needs a gas line connection
🔹 Propane Generators: reliable in off-grid locations but requires a propane tank
🔹 Diesel Generators: powerful and efficient but require fuel storage
When the power goes out, an automatic transfer switch (ATS) detects the disruption and activates the generator within seconds—keeping your home running smoothly without any manual intervention.
Materials, Tools & Equipment
Installing a standby generator requires specific materials and tools for a safe, efficient, and compliant setup.
✔ Standby Generator Unit: powers the home during outages
✔ Automatic Transfer Switch (ATS): automatically switches between grid and generator power
✔ Fuel Supply Lines: connects the generator to natural gas, propane, or diesel
✔ Electrical Wiring & Circuit Breakers: distributes power safely
✔ Concrete or Gravel Base: provides stability and prevents shifting
✔ Grounding Rods & Copper Wiring: ensures electrical safety and code compliance
✔ Multimeter & Voltage Tester: checks safe voltage levels
✔ Pipe & Adjustable Wrench: secures fuel line connections
✔ Drill & Hole Saw: installs wiring conduit
✔ Shovel & Level: prepares a stable foundation
✔ PPE (Gloves, Safety Glasses, Ear Protection): protects installers during setup
Step-by-Step Installation Guide
Installing a standby generator requires careful planning, the right tools, and strict adherence to safety codes. While a licensed electrician is recommended for most of the process, this guide will help you understand each step if you decide to handle certain aspects yourself.
Step 1: Obtain the Necessary Permits
Before starting, check with your local building department to determine what permits are required. Most areas require electrical, fuel, and zoning permits to ensure the installation meets safety regulations. Failing to secure permits can result in fines, failed inspections, or unsafe operations. Contact your local authority to apply for the required permits before beginning any work.
Step 2: Prepare the Installation Site
A stable foundation is essential to keep your generator secure and properly ventilated. Choose a location that meets safety clearances, typically at least five feet away from windows, doors, and vents to prevent carbon monoxide exposure.
Steps to Prepare the Site
- Use a shovel and level to clear and flatten the ground.
- Lay down a concrete pad or gravel base to provide a stable surface.
- Ensure proper drainage to prevent water buildup around the unit.
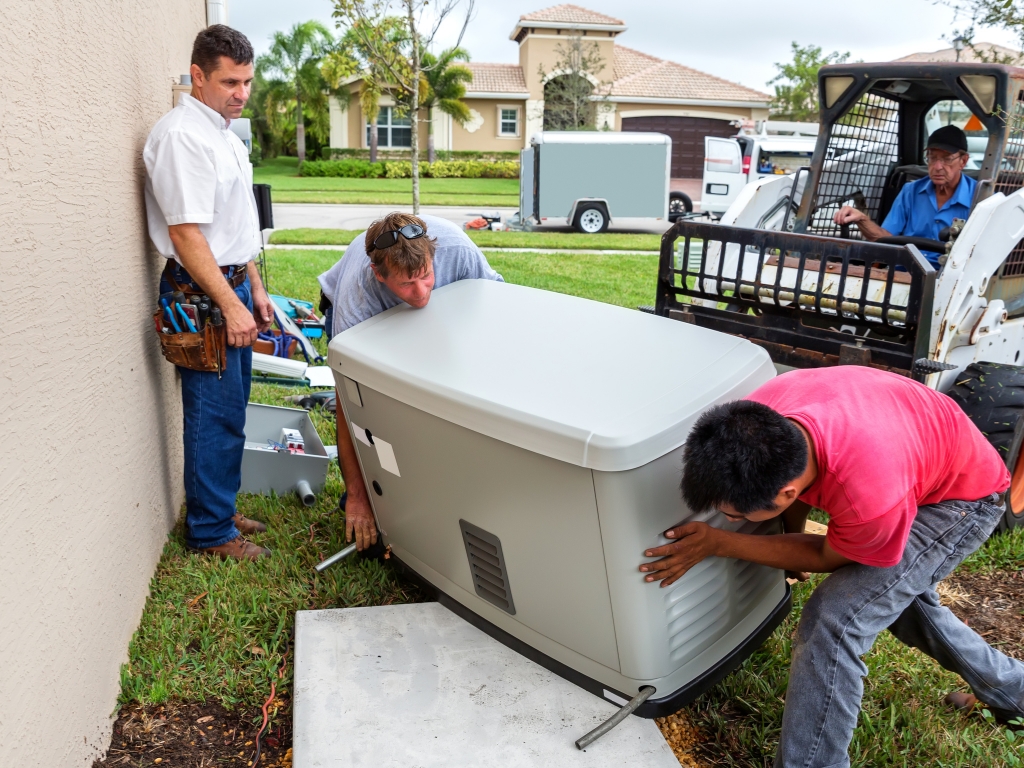
Step 3: Position the Generator
Once the site is ready, move the standby generator unit onto the prepared foundation. Generators are heavy, so you may need help lifting and positioning it. Ensure it sits level to prevent vibrations that can cause operational issues.
Position the generator close to the electrical panel and fuel source to minimize installation costs and reduce the length of wiring and piping needed.
Step 4: Install the Automatic Transfer Switch (ATS)
The automatic transfer switch (ATS) is what allows the generator to switch on automatically when a power outage occurs. This component must be mounted near your home’s main electrical panel and wired correctly.
Steps to Install the ATS
- Turn off the main breaker at your electrical panel.
- Mount the ATS on the wall near the panel.
- Use a drill and hole saw to create openings for the wiring conduit.
- Run conduit from the ATS to the generator location.
- Secure all connections and ensure the ATS is properly grounded.
Step 5: Connect the Fuel Supply
Your generator needs a fuel source to operate, which could be natural gas, propane, or diesel. If using natural gas, you’ll need to connect it to the home’s gas line. For propane or diesel, a dedicated fuel tank is required.
Steps to Connect the Fuel Line
- Shut off the fuel supply before making any connections.
- Use a pipe wrench and adjustable wrench to connect the generator to the fuel source.
- Apply pipe sealant or tape to ensure a secure, leak-proof connection.
- Turn on the fuel supply and check for leaks using a soapy water solution—bubbles indicate a leak that needs tightening.
⚠️Warning: If you’re unsure about handling fuel lines, it’s best to hire a professional for this step.
Step 6: Wire the Electrical System
To distribute power to your home, the generator must be connected to the main electrical panel. This step requires precision, as incorrect wiring can cause power overloads, damage to appliances, or electrical hazards.
Steps to Wire the Generator
- Turn off the power at the main breaker.
- Run electrical wiring and circuit breakers from the generator to the ATS.
- Use a multimeter and voltage tester to verify the correct voltage levels.
- Secure wiring connections and ensure proper grounding.
💡 Tip: If you’re not experienced with electrical work, hire a licensed electrician to complete this step safely.
Step 7: Ground the Generator
Proper grounding is required by electrical codes to protect the generator from power surges and faults.
How to Ground the Generator
- Drive a grounding rod into the soil near the generator.
- Connect copper wiring from the generator’s grounding terminal to the rod.
- Ensure all grounding connections are secure and corrosion-free.
Step 8: Test the System & Final Inspection
Before relying on the generator during an outage, you must perform a system test. If any issues arise, recheck connections or consult a professional before using the system.
How to Test the Generator
- Turn off power at the main breaker to simulate an outage.
- The ATS should detect the loss of power and automatically start the generator.
- Verify that appliances and circuits receive power.
- Check for any fuel leaks, unusual noises, or warning lights on the generator panel.
Step 9: Cleanup & Final Adjustments
After installation, remove any debris and secure all wiring and fuel lines. Before closing out the project, ensure the following:
✔ The generator is properly leveled and secured.
✔ The fuel line has no leaks and is operating correctly.
✔ The ATS is functioning as expected during test runs.
✔ You understand how to perform basic maintenance like oil changes and battery checks.
Is DIY Installation Right for You?
While some steps, like site preparation and positioning, can be handled as DIY projects, fuel and electrical connections require expertise. Standby generators involve high-voltage electricity and combustible fuel, making professional installation the safest and most reliable option.
If you’re unsure about handling fuel lines, electrical wiring, or ATS installation, consider hiring KSB Electric to ensure a code-compliant and safe setup.
Trust KSB Electric
At KSB Electric, we make the process easy, safe, and hassle-free. Our licensed electricians handle everything from permits and site preparation to fuel line connections, wiring, and final system testing. With our expertise, you’ll have peace of mind knowing your generator is installed correctly and ready to perform when you need it most.